How to Spackle Walls – An Easy Guide to DIY
Spackling is an easy and cost-effective way to cover flaws in walls, from dings and holes, to gaps. Perfect for DIYers and paintable once dry, this technique can easily mask flaws on walls.
Before applying any spackling compound to an area, however, you must first ensure it dries completely and follow its directions for full cure time.
1. Prepare the Surface
Spackle can be an indispensable DIYer tool, easily covering up wall imperfections with relative ease. But preparation is the key to any successful spackle application; otherwise, your spackling may look obvious and detract from its overall appearance. In this article, we’ll show how to prepare surfaces before applying spackle so that its finished result blends in seamlessly as part of the wall’s overall design.
Before beginning to spackle, it is crucial that all items on or near the area you plan to work are cleared away, such as baseboards, door hinges and ceiling borders. You should also lay down a drop cloth or towel to protect floors from spackle splatters.
Apply a putty knife, carbide blade (if fixing larger holes), or sandpaper to scrape away any loose paint near the edges of your spackled area, to help ensure that new spackling paste adheres securely without lifting or peeling away later on. This step ensures the best adhesion possible of new spackling paste and won’t lift or peel over time.
If the hole or crack you’re trying to repair was caused by nails, screws, or another fastener protrusion through wallboard, use your putty knife to scrape away any outer fragments or protrusions using gentle pressure with your putty knife. Repeated scrapings may be required if your hole is deep; for optimal spackle adhesion use.
If the hole is larger, a wall repair patch must first be purchased or constructed prior to spackling; for smaller spaces you can usually use only spackling paste alone. Once you’ve applied the paste, sand it down with fine-grit sandpaper until the patch matches up with the rest of your wall and is ready for painting; allow 2-3 hours for full drying before making decisions regarding either sanding or painting it over.
2. Apply the Compound
Spackleing is a straightforward project anyone can tackle; no prior construction experience or expertise are necessary to start spackleing. Some varieties of spackle can dry in as little as 15 minutes! Prep the surface with damp cloth wipe down before removing loose or protruding fragments then apply your chosen spackle compound – taking precautionary steps like covering your work area floor with cloth or drop sheet to prevent spackle splatters!
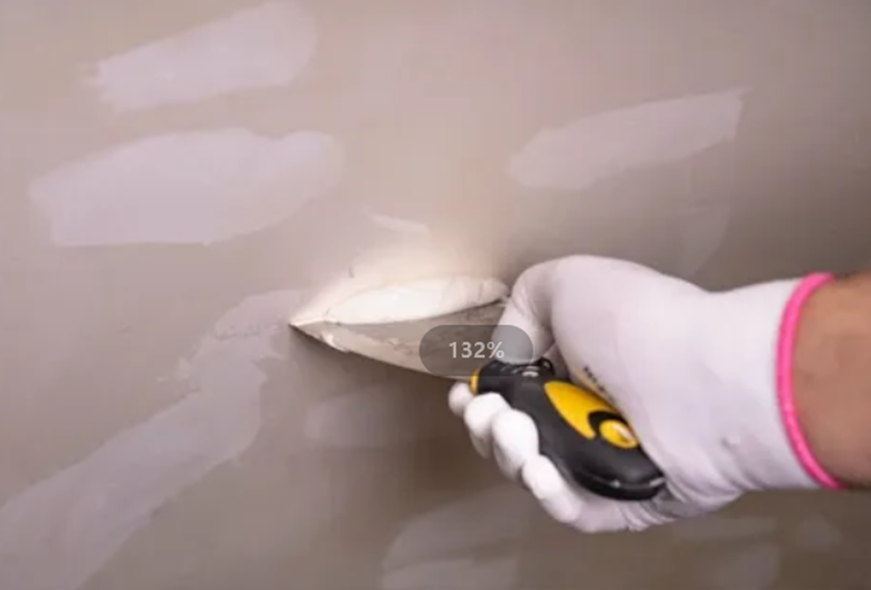
Use the edge of a putty knife to scoop out just a small amount of premixed spackling compound from its container, just enough to cover any holes or cracks in need of attention. Remember that since it can easily be wiped off later, just a little can go a long way!
Position the blade of your putty knife just above the damage, then move it across the wall in an upward motion using gentle pressure to smooth out damaged areas of drywall. Don’t be alarmed if some compound gets on nearby walls; just wipe it away later to smooth it over!
After applying a patch, gently scrape away any excess with your knife and damp cloth before waiting several hours for it to fully dry out – this step is necessary as many spackle compounds shrink as they dry, causing the patch to sink further into its new home in holes or cracks that it was repaired in.
While waiting, sand down the spackled area with fine-grit sandpaper to help it blend in seamlessly with the surrounding walls and make it ready to paint or paper over. Once dry, use a damp cloth to wipe it down again to clear away any dust particles; additionally this is also a great opportunity to check for spots that have receded since drying; should any occur, apply another coat of spackle and wait a bit before resanding again.
3. Let It Dry
Spackle compound is ideal for quick repairs such as nail holes or furniture dings, wall patches before repainting, or making quick patching repairs in small spaces like an apartment balcony or hallway. As it dries quickly with minimal shrinkage, making spackling the perfect DIY material. However, first-time users should make sure they take their time in preparing the area thoroughly beforehand.
Before beginning to spackle, make sure you have ample time and are in an environment with proper ventilation. Humidity can delay drying process while air movement will speed things up – open windows or turn on fans to improve airflow around your work area.
Once your spackling has dried, it’s time to sand it down. Use a fine-grit sandpaper and carefully move it across its surface – this will smooth any areas where it raised above its surrounding walls. When finished, wipe away any dust with a damp cloth before leaving it alone again so it can dry properly before painting the area.
Keep in mind that it takes about four to five hours for one layer of spackle to fully set before applying a second one; otherwise it could cause uneven surfaces on walls and prevent you from applying new paint layers.
Once the spackling has set, it’s time to begin prepping for your next painting project. Clean your tools and the container it was mixed in before it has time to harden rock hard; otherwise you may need to create another batch, making your task more complicated than necessary.
If you are unfamiliar with spackling walls, professional services may be best for you. But, if you feel confident in your abilities, anyone can complete this task themselves using appropriate materials and patience – once mastered you’ll be able to tackle any hole in your wall with ease!
4. Sand It Down
Like any home improvement project, wall sanding requires careful preparation. Remove any furniture that will get in the way and put down a drop cloth or towel on the floor to protect it from spackle splatter. Be sure that your work area is well lit, so that you can see clearly. Additionally, it would be wise to wear a mask when sanding down walls to reduce dust exposure.
Before applying a spackle application, clean the area around it using a damp sponge or cloth. This will allow for better adhesion of the compound, and reduce chances of an obvious patch being created by spackle application. If any protruding edges or fragments of drywall surround the hole, a putty knife can be used to smooth them until they’re as even with the rest of the wall surface.
Most people purchase spackle from stores, but if you have some time and the appropriate ingredients at home you can easily create it yourself. A recipe similar to playdough’s can help create homemade spackle that works well in filling holes up to 1/4-inch wide; plus it makes an excellent way to repair nail holes since its texture matches up perfectly with surrounding paintwork.
After your homemade spackling has set, lightly sand it to smooth its surface. This step is especially essential if the patch appears to have shrunk or receded as it dried, which is common for most spackling compounds. Start off using medium-grit paper before switching over to fine-grit for an optimal finish. Upon completion of sanding, wipe down all surfaces to eliminate dust accumulations.
If you have an extensive project underway, hiring professional drywall installation and painting services might be wise. But for smaller repairs like patching small holes in the wall quickly and effectively using this handy trick can help get it done in no time at all – with practice you will soon be giving your walls that professional look!