How To Install A Kitchen Faucet Properly
Replacing a kitchen faucet can be an effortless DIY project, but it is important to understand the process beforehand in order to avoid common errors and ensure your new fixture is installed securely. This will also prevent common mistakes from being made during installation and prevent missteps that could potentially cause unnecessary cost or delay.
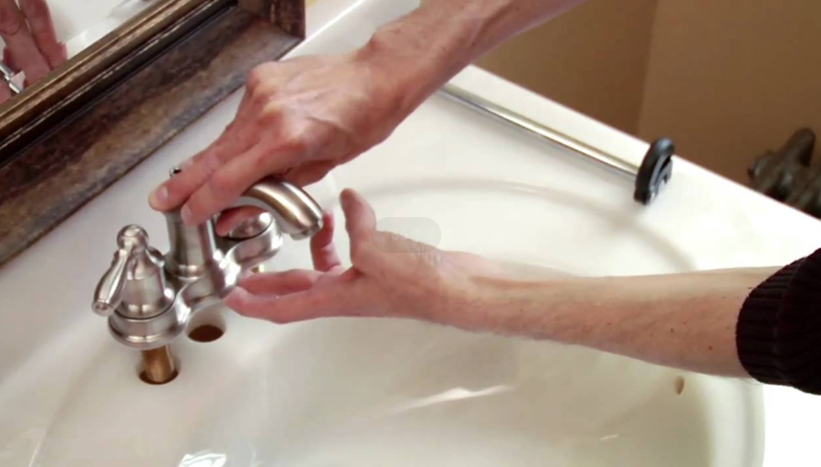
1. Turn Off the Water
Your kitchen faucet is one of the most utilized fixtures in your home and should be seen as an essential feature, yet when it needs replacing it can be an inconvenience. However, thanks to simplified processes and tools designed specifically to make do-it-yourself installations possible for anyone willing to give it a go – installing a new faucet doesn’t need to be daunting project anymore!
Before beginning this project, turn off the water to your sink. For best results, open up your cabinet beneath the sink, remove any items stored there, locate and shut off the valves that control supply lines (Photo 2), then find two pipes running from tailpieces of current faucet down into wall or floor, each featuring a lever or knob that can be turned clockwise to shut off water supply lines (Photo 3). Trace these lines backwards – one may lead back into your sink while one could go to other areas such as a refrigerator – to determine where they end up going (Photo 4).
If the knobs on these pipes are hard to turn, first try brushing away as much corrosion with a wire brush, followed by spraying them with penetration oil such as Liquid Wrench to help dissolve any remaining rust. If that doesn’t work, consider cutting off the line with a pipe cutter.
At this point, it would be prudent to switch out your old metal supply tubes for stainless steel-sleeved ones that can be found at most hardware stores. Furthermore, invest in a basin wrench ($15; Photo 4), equipped with spring-loaded jaws that pivot and loosen/tighten nuts in hard-to-reach places.
2. Remove the Old Faucet
Installing a kitchen faucet may seem straightforward, but there can still be potential hurdles along the way. To avoid potential hiccups during installation, it is essential that the project is planned carefully prior to beginning; for example, make sure that its new counterpart has equal holes as the previous one and is compatible with water supply lines. Furthermore, take photos of your current situation; this could come in handy should any confusion arise during assembly.
The first step to remove an old faucet is removing it from its wall by disconnecting water hoses and loosening nuts beneath the sink using a basin wrench. Once loosed, the faucet should lift up easily for removal from its mounting and can even leave behind its plastic base that may make your new one fit more seamlessly into place.
After this step is complete, you should remove the plate covering the valve in the wall. This may be slightly uncomfortable as you will likely need to lie down and twist awkwardly in order to gain access. If possible, having someone assist is ideal during this phase.
Once the plate has been removed, you can replace the valve stems and connect both hot and cold water line hoses to your faucet using Teflon tape – this should help minimize leakage risks. Once everything is connected and tested for functionality, test it further to make sure everything works as it should before calling in a professional plumber if necessary.
3. Disconnect the Supply Lines
Every faucet sees daily use and can develop issues like drips or water flow issues over time. Replacing kitchen faucets is typically an easy DIY project that can usually be completed in under an hour. First, disconnect the water supply by twisting off its shutoff valves underneath the sink. Sometimes tightness needs to be adjusted by wiggling; this may occur due to tight connections or old age; be sure to have an additional bucket or towel handy in case any residual water escapes when turning off your faucets.
Now, if your faucet features a sprayer hose that clicks into place, be sure to fully connect and retract the line before disconnecting any water lines. Follow your manufacturer’s instructions when doing this; in general this involves adding weight to the hose before retracting until completely detached from its source line. If your sink features its own separate sprayer system with its own dedicated line that connects to its holder with a nut that needs loosening using a basin wrench.
Next, dislodge the nut connecting the hose to the water line using a basin wrench. As this nut may be hard-to-reach, once you loosen it you should be able to twist it off by hand and detach the hose easily from its connection point. Once completed you should also be able to detach it easily from its waterline home base.
4. Remove the Nuts
Before attempting to unscrew or dislodge a heavily corroded or stuck nut, make sure all water has been switched off and place a bucket under any supply tube connections so as to capture any splashing of liquid as you work.
If you are having difficulty loosening a nut, try applying some penetrating oil before trying to use a wrench. This should help loosen it by breaking up corrosion or adhesive build-up; it may take multiple applications before the nut loosens completely though.
Alternatively, you could try tapping the nut gently with a hammer in order to break up corrosion or adhesive residue; just be cautious not to strike anything directly – such as faucet components – during this process.
Once the nut is loose, disconnecting supply tubes is easy. If working on an older faucet, consider switching out its old copper tubes for stainless steel-sleeved versions that offer rupture-free service over years and can easily route around obstacles without kinking. You will also require a basin wrench ($15; Photo 4), designed specifically to remove and install hard-to-reach fasteners that hold older faucet assemblies onto sinks.
Alternatively, an adjustable wrench or pliers may suffice for disconnecting water supply tubes. When it comes to cutting copper tubing, there are multiple methods you can use, from regular tubing cutters and pipe benders, to tubing pipe benders for easier cutting. A basin wrench offers numerous advantages by virtue of its spring-loaded jaws pivoting to loosen or tighten nuts in tight spaces as well as its detachable handle giving greater access to nuts.
5. Remove the Faucet
If your kitchen faucet is showing signs of wear – loose handles, dripping water or inoperable valve – it may be time to consider updating to a new faucet. Upgrading can be done quickly and affordably to give any room an immediate refresh and make them more inviting. To make sure the job goes smoothly, follow these steps:
Assemble your tools first: channel-type pliers and possibly a basin wrench (Photo 4). A basin wrench’s spring-loaded jaws pivot so you can loosen or tighten fasteners holding older faucets to sinks, as well as new stainless steel-sleeved supply tubes designed to provide years of rupture-free service and easily route around obstructions without kinking.
Turn off the water at both shut-off valves under your sink, and place a bucket beneath water supply tube connections (Photo 1). Use a hacksaw or tubing cutter to cut away old tubes at their connectors beneath the sink; additionally, you may require a plumber’s wrench for unscrewing any nuts at the base of an old faucet (Photo 3).
Once all old lines have been disconnected, take down and take away the faucet from its mounting on the wall. For single-handle faucets, unscrew their handle and spout mounting nuts (Photo 2) before gently pulling on its body (you may need to yank slightly to dislodge it from its bolt). It would also be wise to put a towel underneath it so as to protect the cabinet and floor in case anything drops on them!
Before reconnecting your new faucet to its supply line, apply a thin bead of plumber’s putty under each edge of each escutcheon plate, pressing them into place. Reconnect hoses to their respective faucet bodies then tighten locking nuts using hand tightening tools; add Teflon tape around each connection for added leakproofness.