How to Clean a Fridge Thoroughly and Safely (8 Steps)?

The fridge is a crucial appliance for preserving food freshness year-round. While low temperatures extend food shelf life, overlooking maintenance can lead to issues like mold, odors, ice buildup in the freezer, and a greasy exterior.
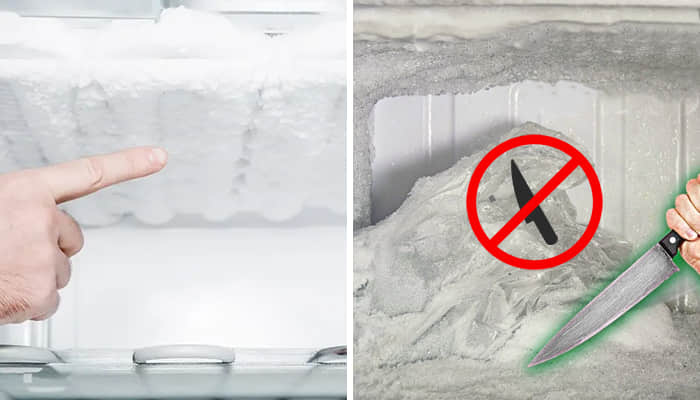
One common but risky practice is using a knife to scrape ice from the freezer, potentially causing refrigerant leaks and safety hazards (such as the risk of explosions related to difluoromethane). This guide will detail safe and thorough fridge cleaning methods to avoid these issues.
List of Tools Needed for Fridge Cleaning:
- Warm water
- Baking soda
- White vinegar
- Microfiber cloth/ Towel/ Sponge
- Spray bottle
- Dish soap
- Toothbrush
- Vacuum (optional)
- Tight-fitting nitrile gloves and an N-95 mask (If there is rotten food or mold in the fridge.)
Step 1: Unplug the fridge

As water is involved in the cleaning, it’s crucial to ensure safety by shutting off all power before cleaning. The surest method is to unplug the fridge.
Step 2: Remove all food, shelves, and drawers

Remove all items from the fridge to facilitate thorough cleaning of all corners and crevices, preventing food contamination. Before cleaning the shelves and drawers, set them aside until they reach room temperature. Using warm water directly on cold glass and plastic may cause cracking and scratching.
Step 3: Prepare the cleaning solution
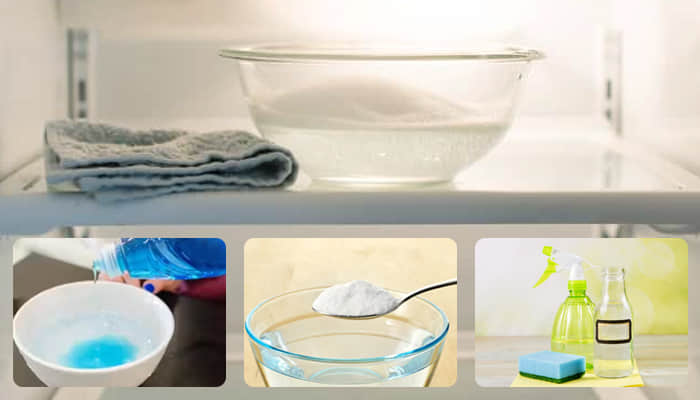
During the interval while waiting for the fridge and accessories to return to room temperature, prepare three cleaning solutions.
For grease stains (Solution 1): Add a few drops of dish soap to warm water, stir well.
For stubborn dirt (Solution 2): Create a paste by mixing baking soda with water.
For disinfection (Solution 3): Mix white vinegar and hot water in a 1:3 ratio, pour into a spray bottle.
Step 4: Scrub the interior and accessories with the cleaning solution
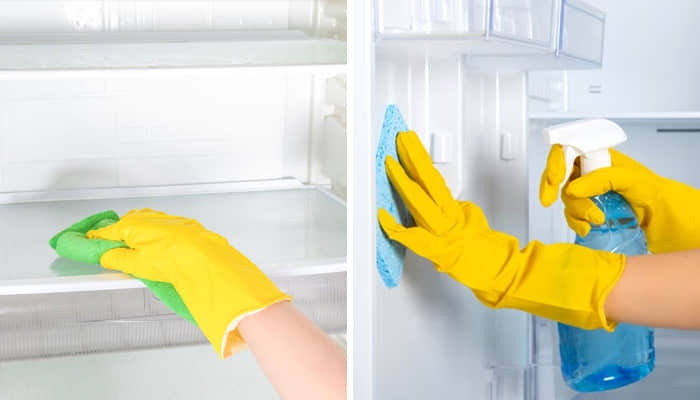
Soak a clean rag or soft sponge into Solution 1 (dish soap) and wipe the interior and accessories, focusing on areas with spillage and stains. This way can remove most of the dirt while leaving a refreshing scent of dish soap.
For particularly stubborn stains, use Solution 2 (baking soda). Apply the paste to the stains and use an old toothbrush to work it in until the stains disappear.
Finally, spray the inside with Solution 3 (white vinegar). Wipe it clean with a dry dishcloth.
Step 5: Wipe down the rubber gasket
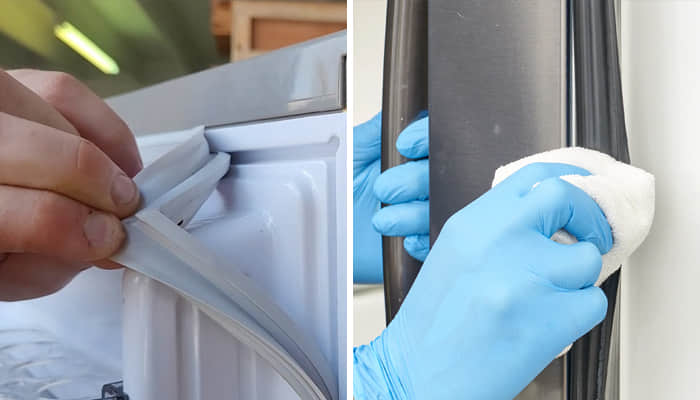
Don’t overlook the rubber seal (or gasket)! The folds on the seals can collect debris and even develop mold and mildew. Deep cleaning helps extend the lifespan of the rubber seals and maintains a proper seal (preventing icing). Simply wipe them with a damp cloth to remove food residues and dust. If dealing with grease stains, use Solution 1, as other detergents may damage the gaskets.
Step 6: Clean the outside with dish soap
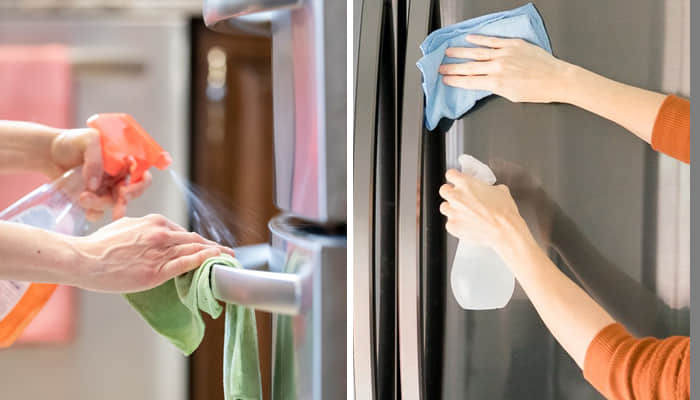
The methods for cleaning the outside are similar to those for the inside. If the outside has only dust, a damp cloth is sufficient for cleaning. If it feels greasy to the touch, use a solution of dish soap to scrub.
Step 7: Clean the water line
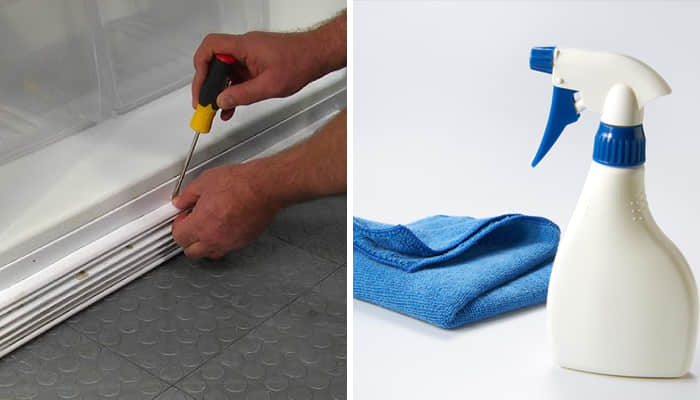
This step only applies to fridges that have built-in dispensers for water and ice. The built-in water tube in the refrigerator will collect moisture, which is then retained in a tray located near the bottom at the back of the fridge. This water accumulation can foster the growth of bacteria and mold, possibly contributing to unpleasant odors in your fridge.
To address this issue, start by using a screwdriver to remove the back cover at the bottom of the refrigerator to access the water tray. Clean the tray thoroughly and reinstall it. Next, inject a mixture of white vinegar and water into the water tube, rinse it several times, and finally, dump the wastewater collected in the water tray.
Step 8: Remove ice buildup in the freezer
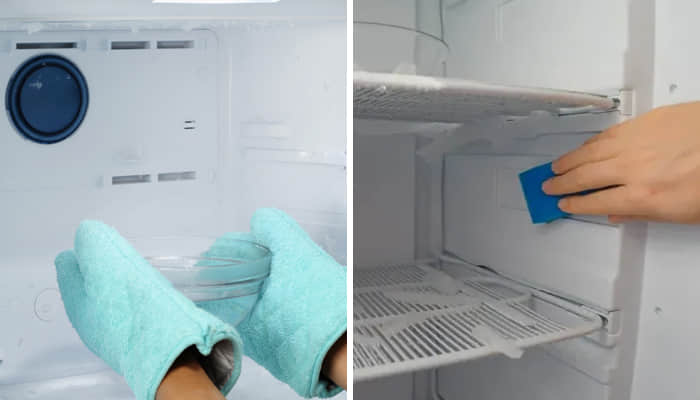
Fill a large basin with hot water and place it inside the freezer with ice buildup. Close the door and wait for a few minutes. Afterward, you’ll notice that you can easily remove all the ice by gently scraping it with your fingers.
In addition to the above 8 steps, we also provide the following tips to help ensure safety:
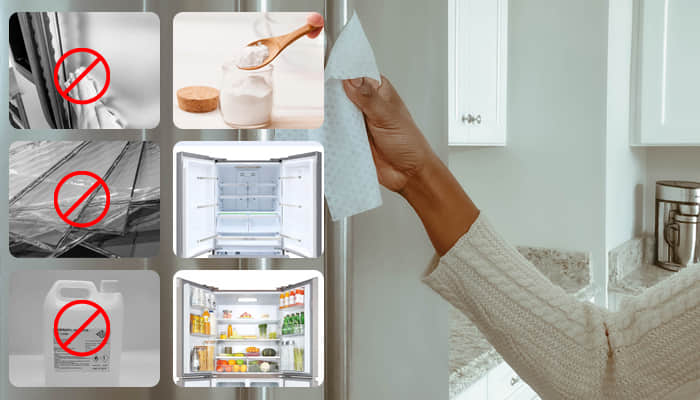
- Avoid using abrasive cleaners or hard brushes to prevent damage to the fridge surface.
- Refrain from using cleaners containing alcohol or ammonia during cleaning, as they may harm the refrigerator’s plastic components.
- Handle glass parts with care during the cleaning process.
- If the refrigerator has unpleasant odors, placing a bowl of baking soda after cleaning can help absorb residual odors.
- Ensure the interior of the refrigerator is completely dry before reconnecting the power to prevent electrical issues.
- After completing the cleaning, reconnect the power, wait for the refrigerator to cool to its normal operating temperature, and then place the food back inside.